

Artist Diary Day 3 ⛲️How to fill an Artist Diary
How to set up your Artist Diary.
You are now reading Day 3 of this FREE 5 day email course, where I give everything you need to start and maintain an artist diary.
Missed Day 1? Start there: Why it’s so easy to get ideas but so difficult to turn them into anything tangible.
3 Different formats for setting up your Artist Diary.
At the end of this 5 day email course I will offer you a way to get daily ideas and prompts that you can use for your artist diary. But for now I want to offer you a number of templates and setups as different ways to layout your spreads.
You can pick one and do it daily or you can mix and match.
As you develop your art diary it will evolve to suit you, but until then I want to share some starter ideas for laying out your spreads. But before we start let’s talk about the index.
An artist diary is going to be a great source of joy and insight not just when you are making it, but when you come back to it later and when you want to look something up. And this pleasure can be heightened by the simple tasks of creating an index.
Creating an index
Here’s how you do this.
Number each spread. At the top right corner of the first spread write the number 1, then turn the page and on the top right corner of the next spread write the number 2, and so on. Numbering the spread instead of the page will mean you only need half the effort to number the whole book.
Then on spread one write the word INDEX at the top of a page as a title.
Whenever you start a new topic in your art diary write that topic in the index followed by the number of the spread.
If you revisit the topic further along the book you can add that spread number to the line.
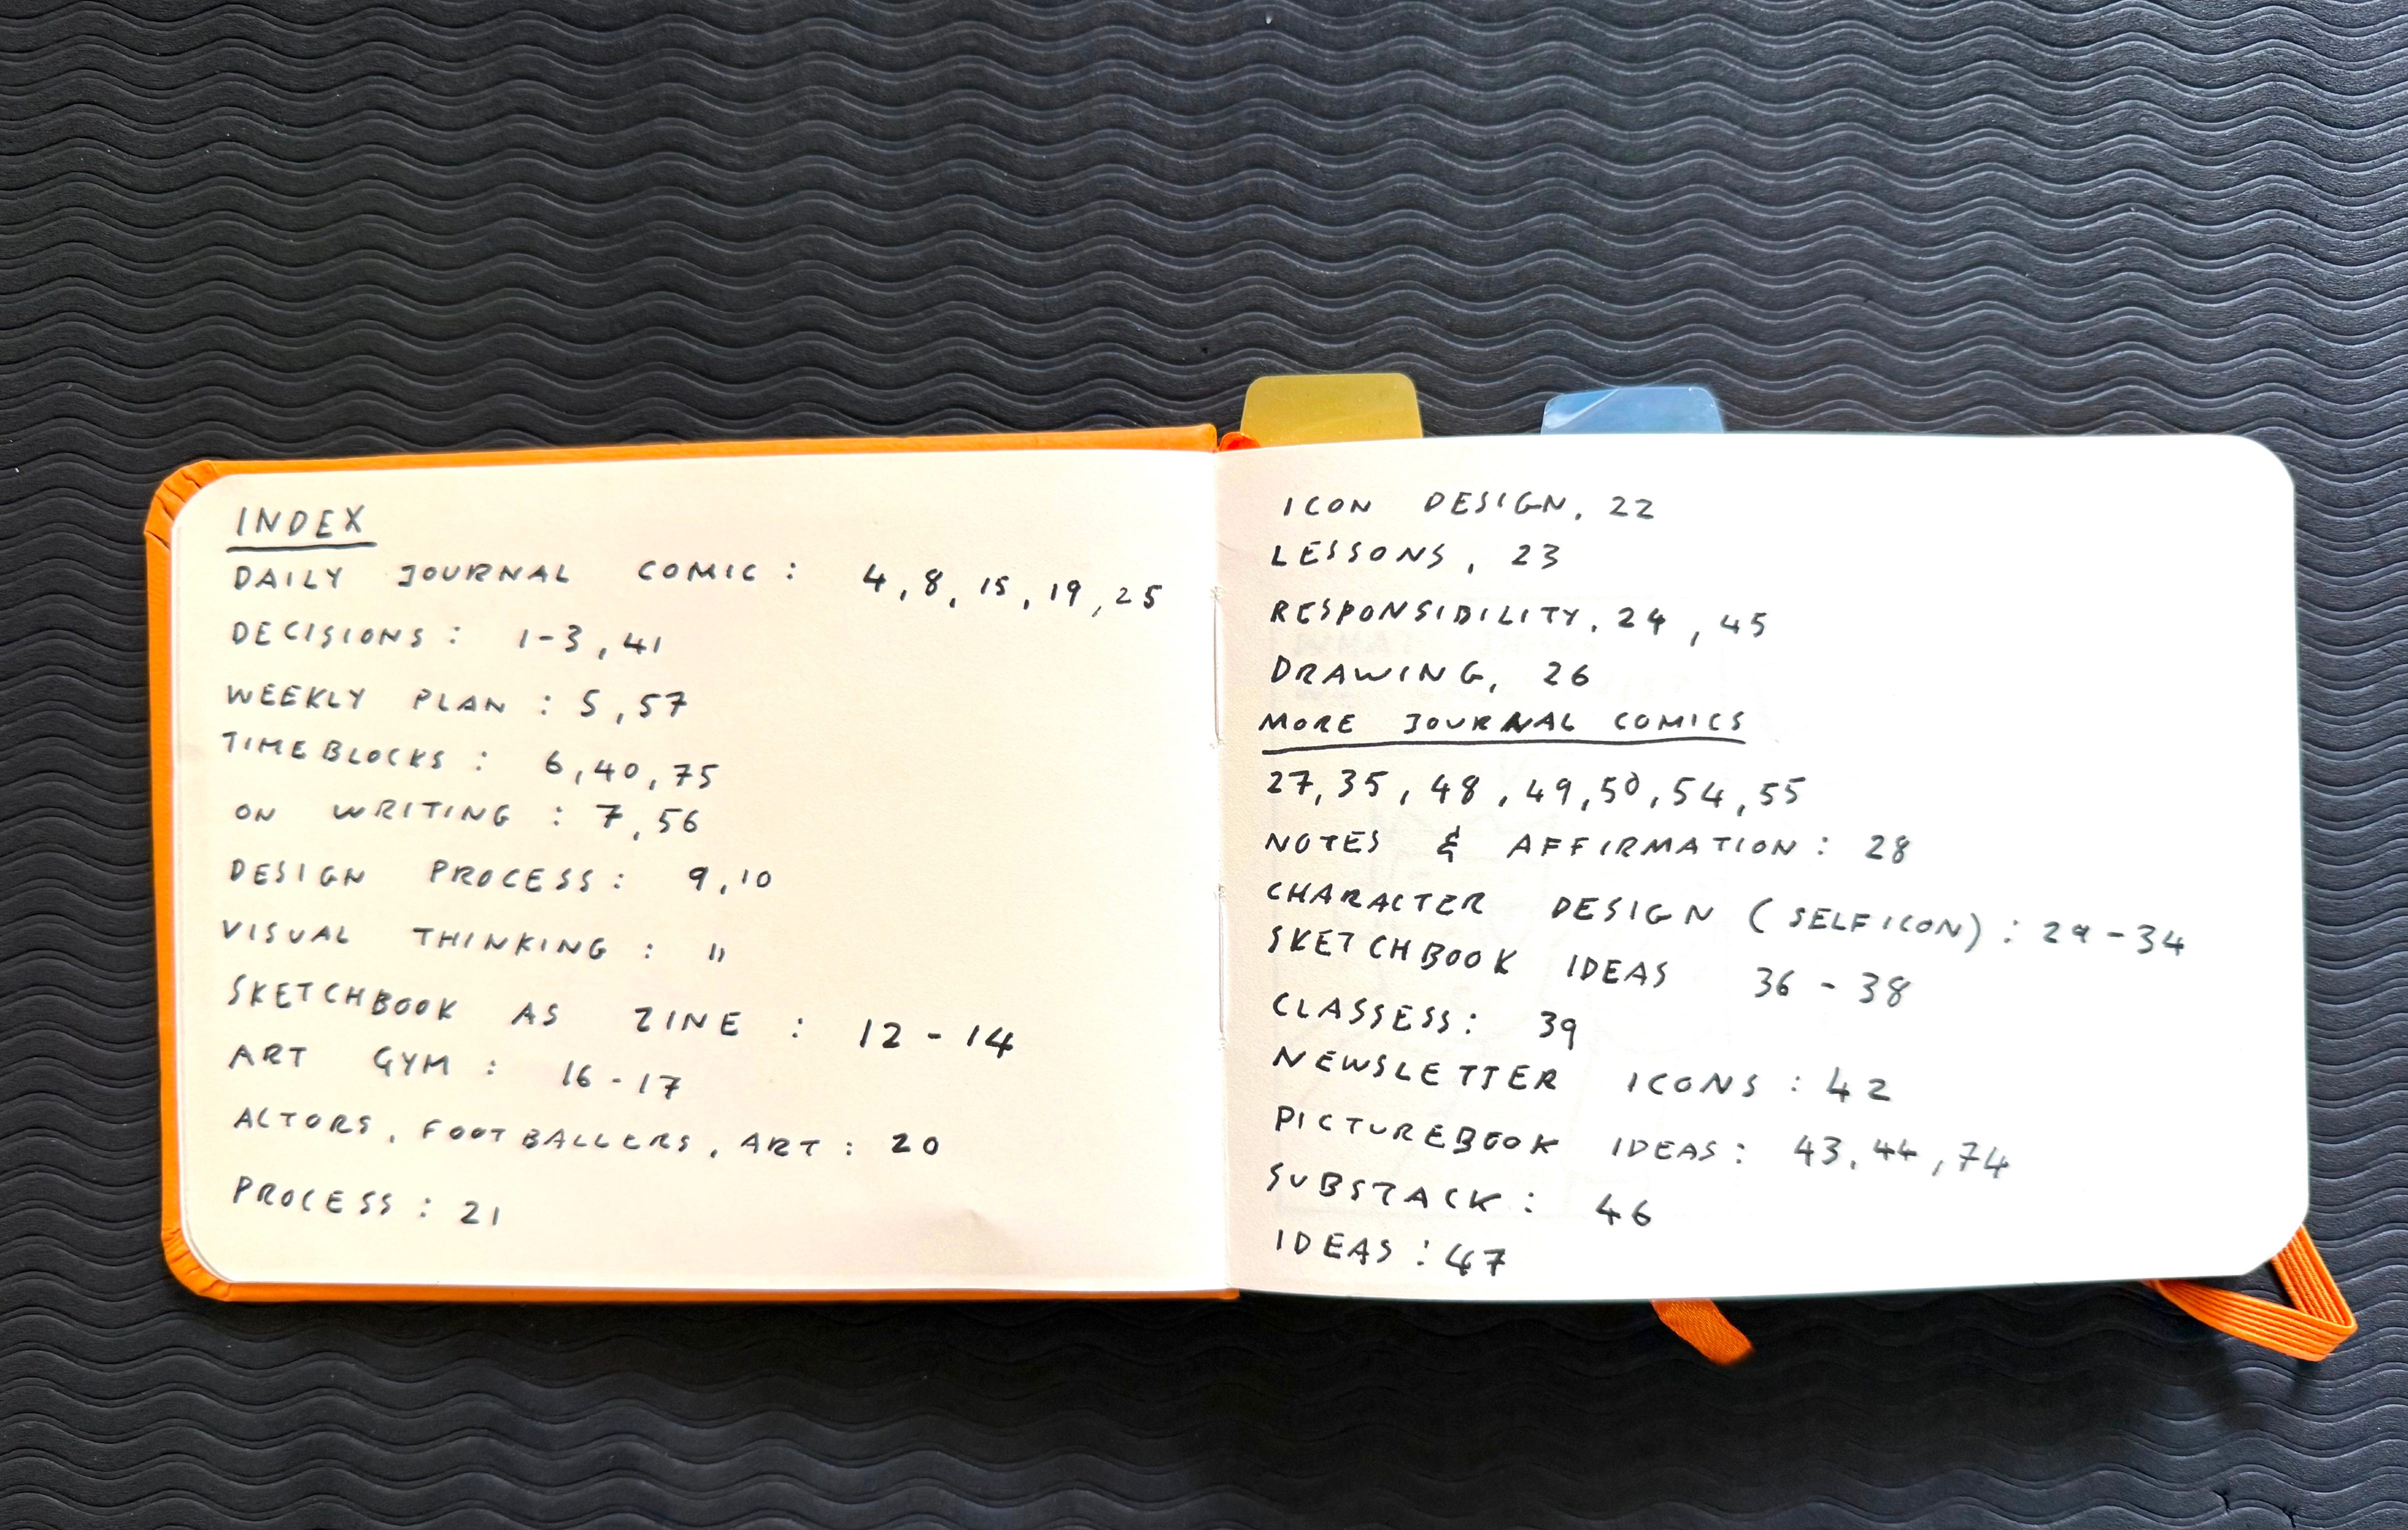
Having an index will help make your artist diary so much more scannable and organised. It’s also a relaxing and mediative way to start your practice.
⚠️ Whenever you create an entry; write the date.
Types of Spreads
Here I’m going to share a few ways to set up your spreads. But as a reminder, an artist diary is anything you want it to be, there is no wrong way, instead these are suggestions of things that have worked well for me over the years that you might consider incorporating into your practice.
These are not rules. Use what works for you and adapt different ideas to form your own practice. I do find it useful to to try a structure for a period of time and see how it serves you.
A Sketchbook Spread
If I’m drawing, I try to only draw on the right page of the spread.
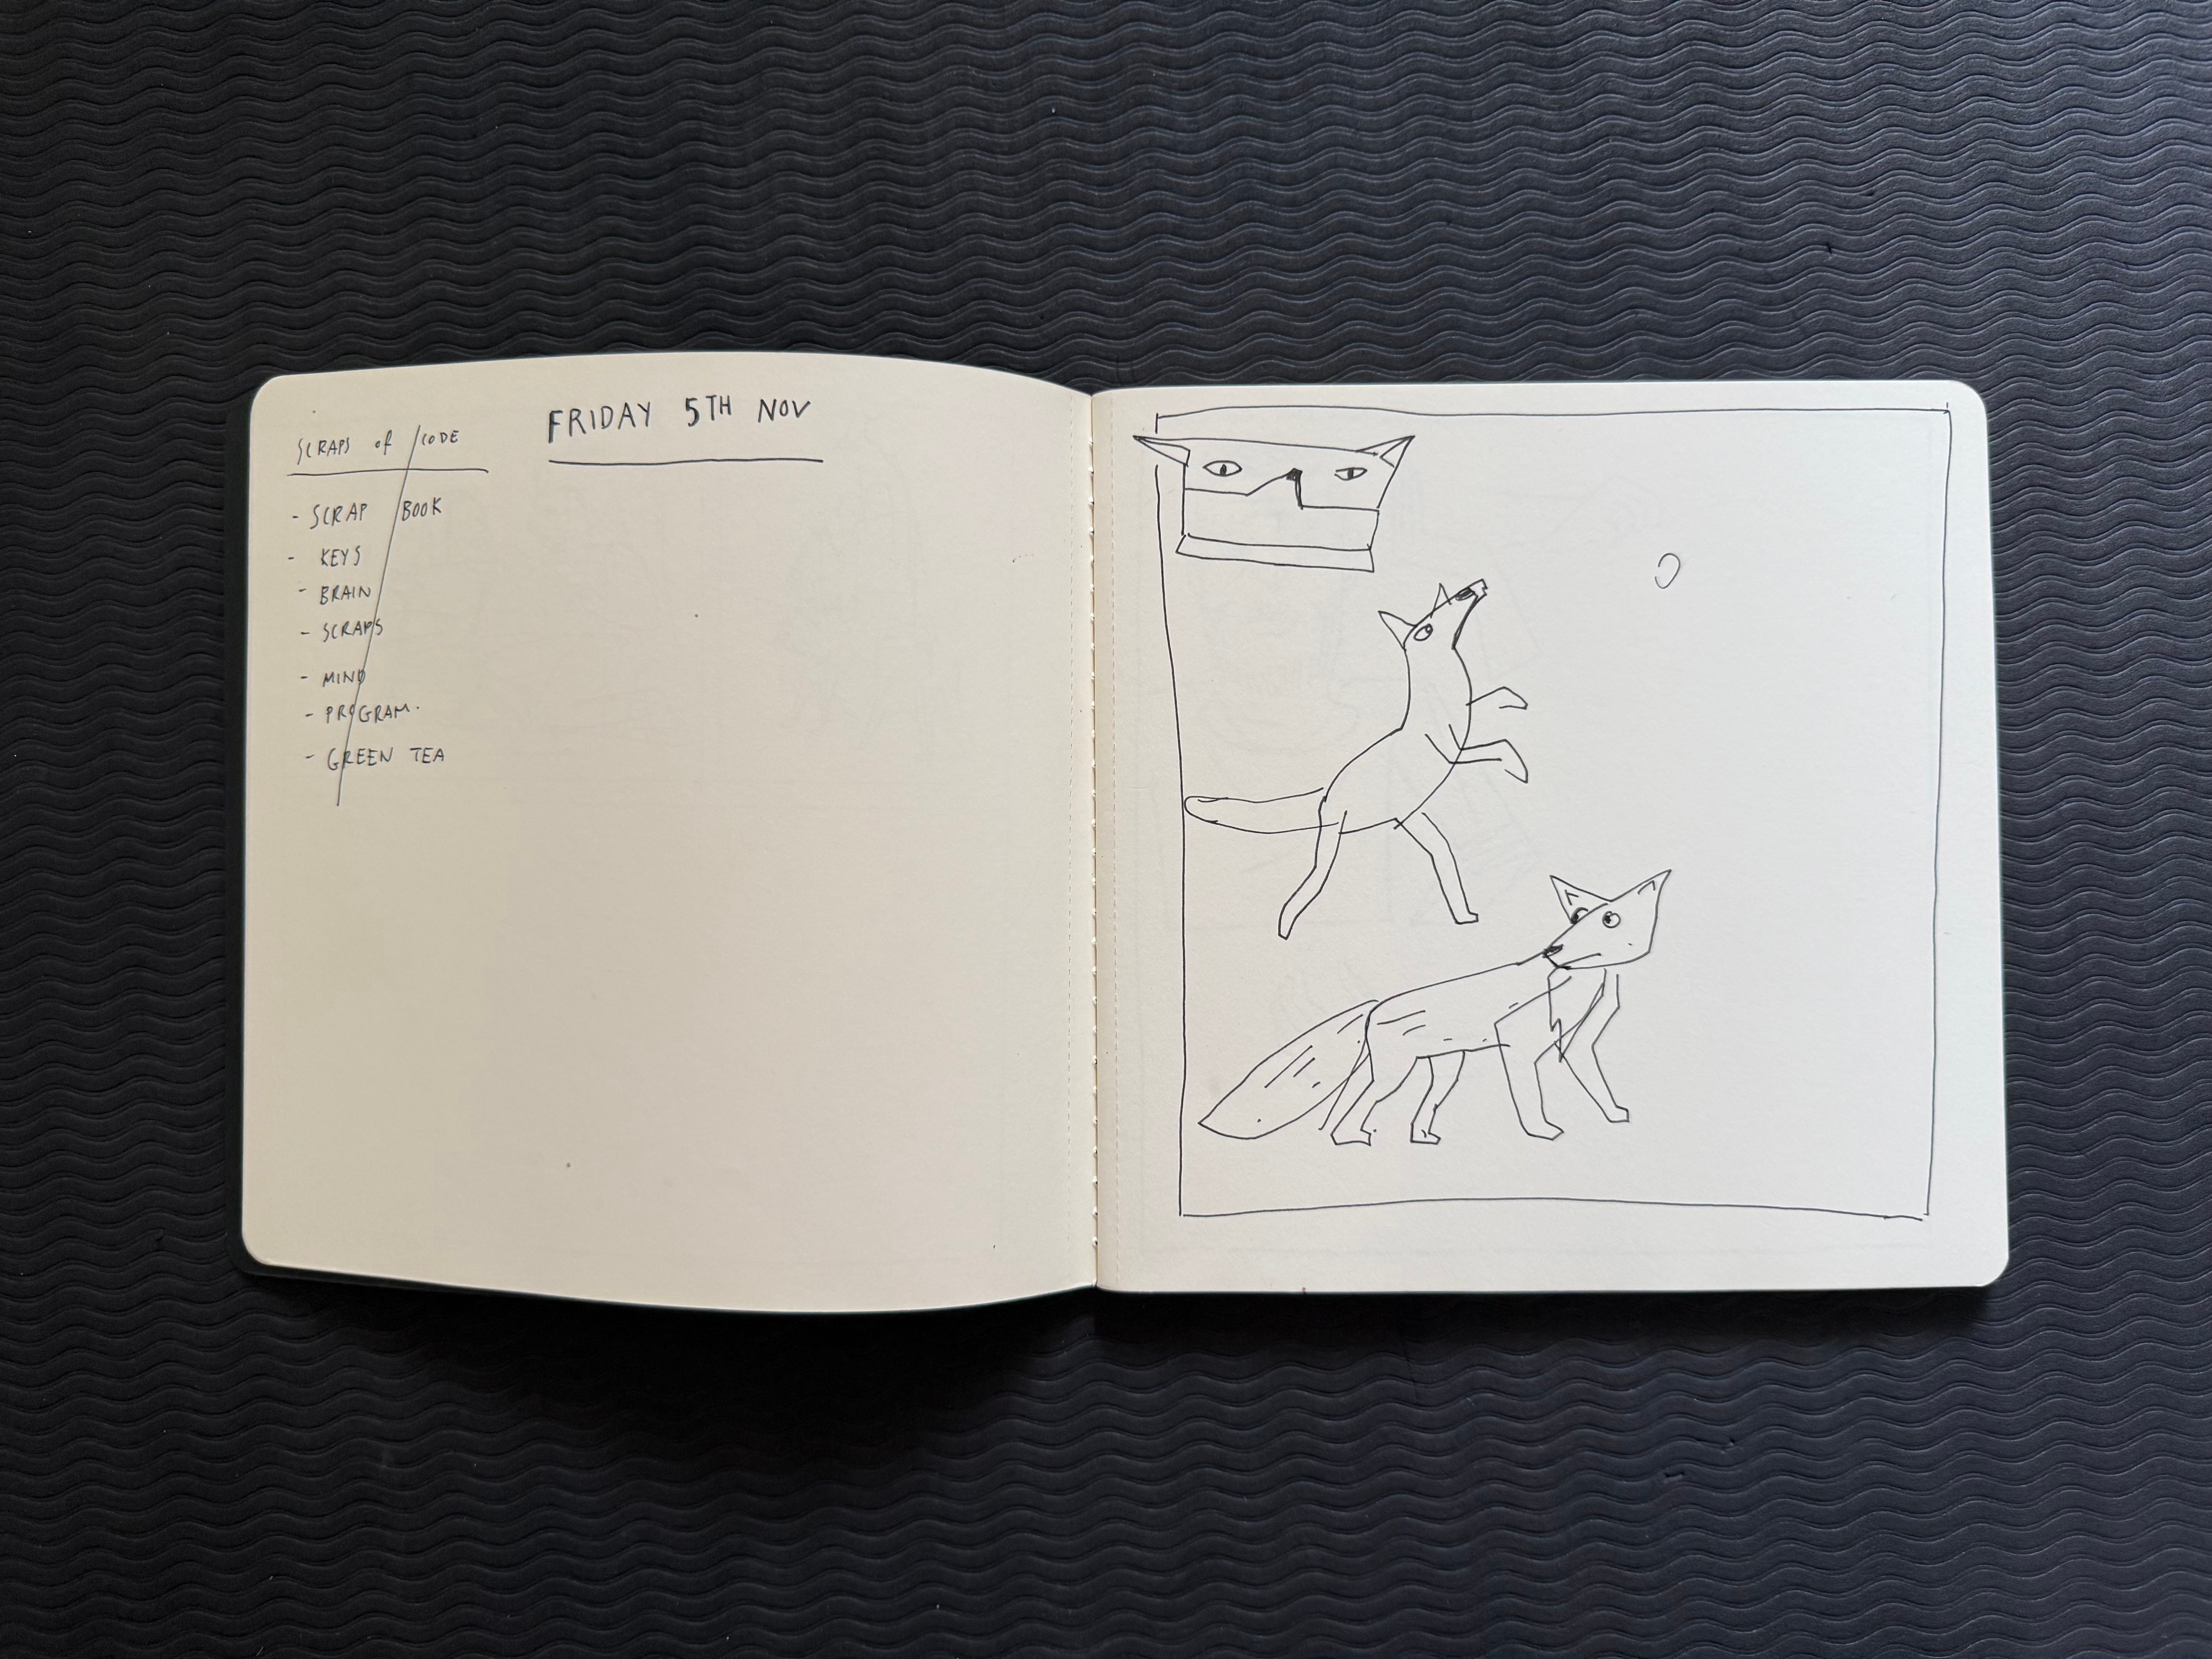
Start by drawing a frame on the right hand page, this serves as a stage for a drawing, this frame might be largely the size of the page or it can be much smaller. You might even experiment with proportions drawing a portrait or a horizontal frame within your page. The frame is the space for the finished picture.
The left hand page then serves as a kind of staging area. I might write notes before or after the drawing or even try a few practice sketches and thumbnails before starting the actual drawing.
By having a drawing area and a kind of back stage area I’m able to capture not just the image but also a glimpse into the process which is often just as interesting, maybe even more interesting.
A Five Minute Diary Page.
I’ve adapted this from Lynda Barry. It’s an assignment from a class she teaches about ‘seeing what’s there.’
Here’s my version, start with a frame as usual. You can do this on the left or write page. Start with a frame, then divide the frame into 4. Have the frames on the top be a little smaller and the frames on the bottom look a little smaller.
This is how you will fill the frame.
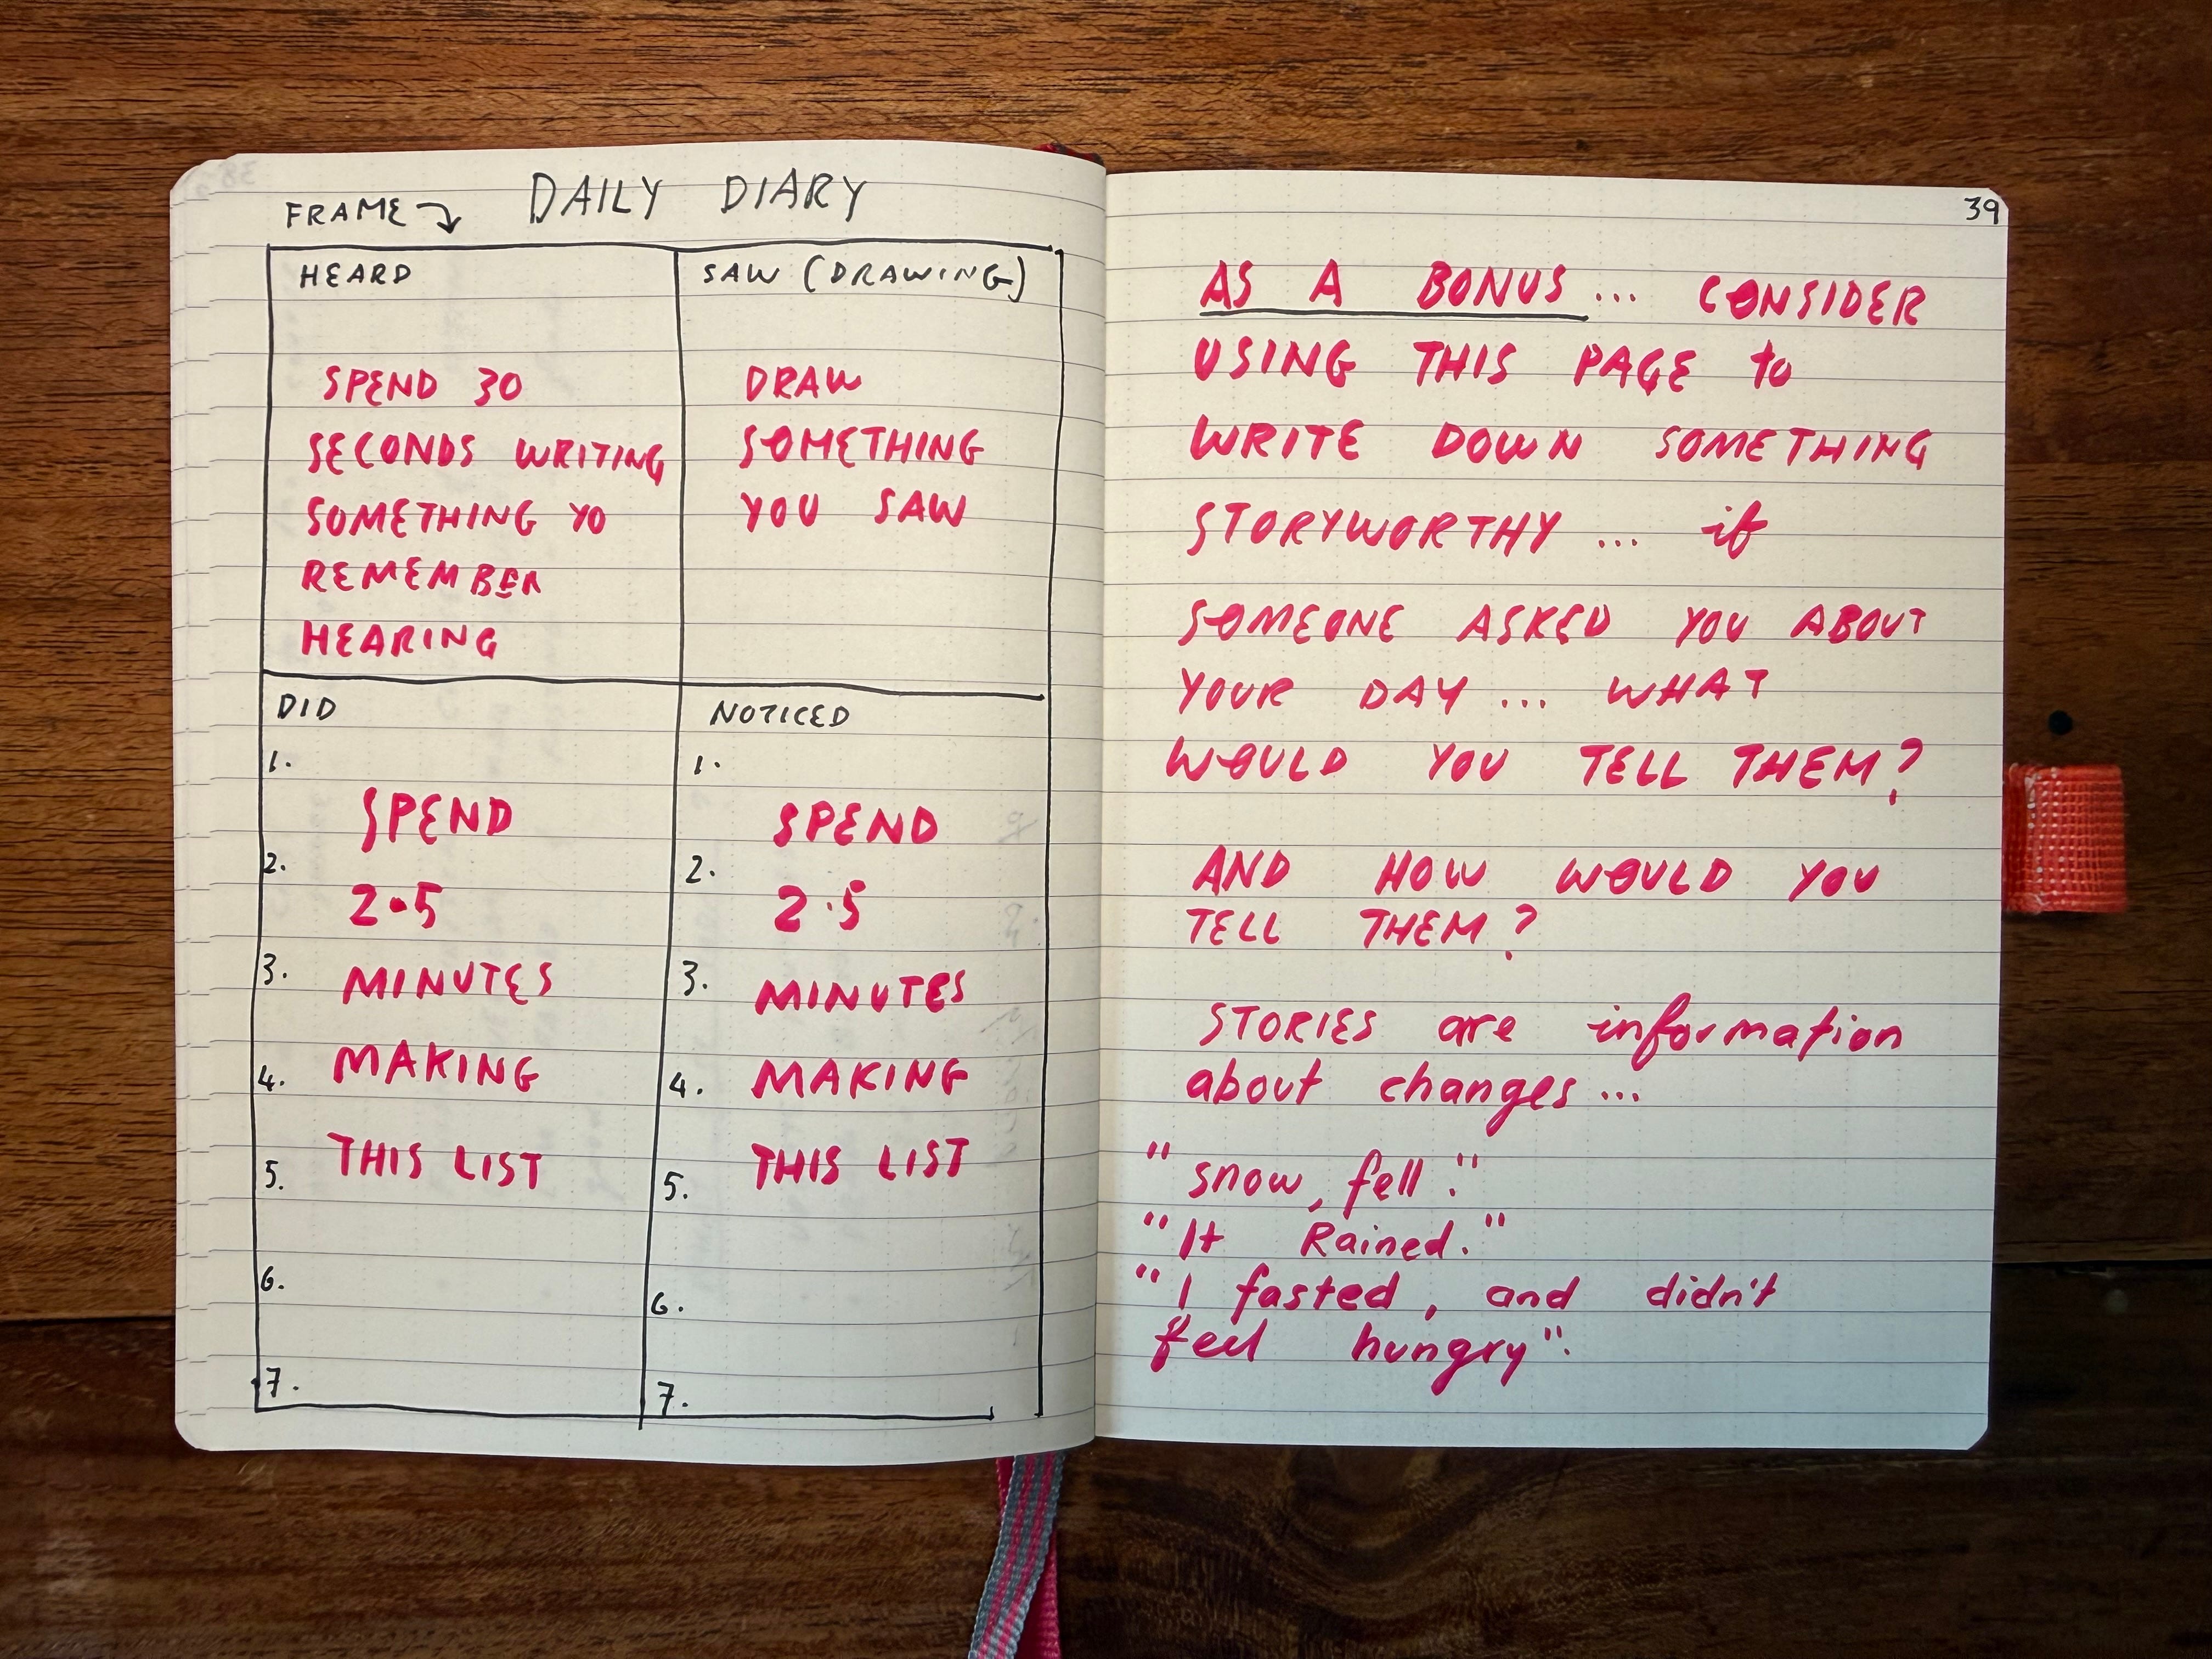
This is the 5-Minute Diary (Lynda Barry style)
Write down something you heard
Draw something you saw
Make a list of things you did
Make a list of things you noticed
Your diary will teach you how to see, hear and notice the world around you.
If you have another 5 minutes…
In the next page (and totally optional) I suggest answering this question.
If someone asked you about your day, what would you tell them?
As you answer that question, think about how to make it into a story, what is the beginning, the middle and the end. Design your story around what changed.
A Four Panel Comic
This is my go to prompt. It gives me the most bang for my buck.
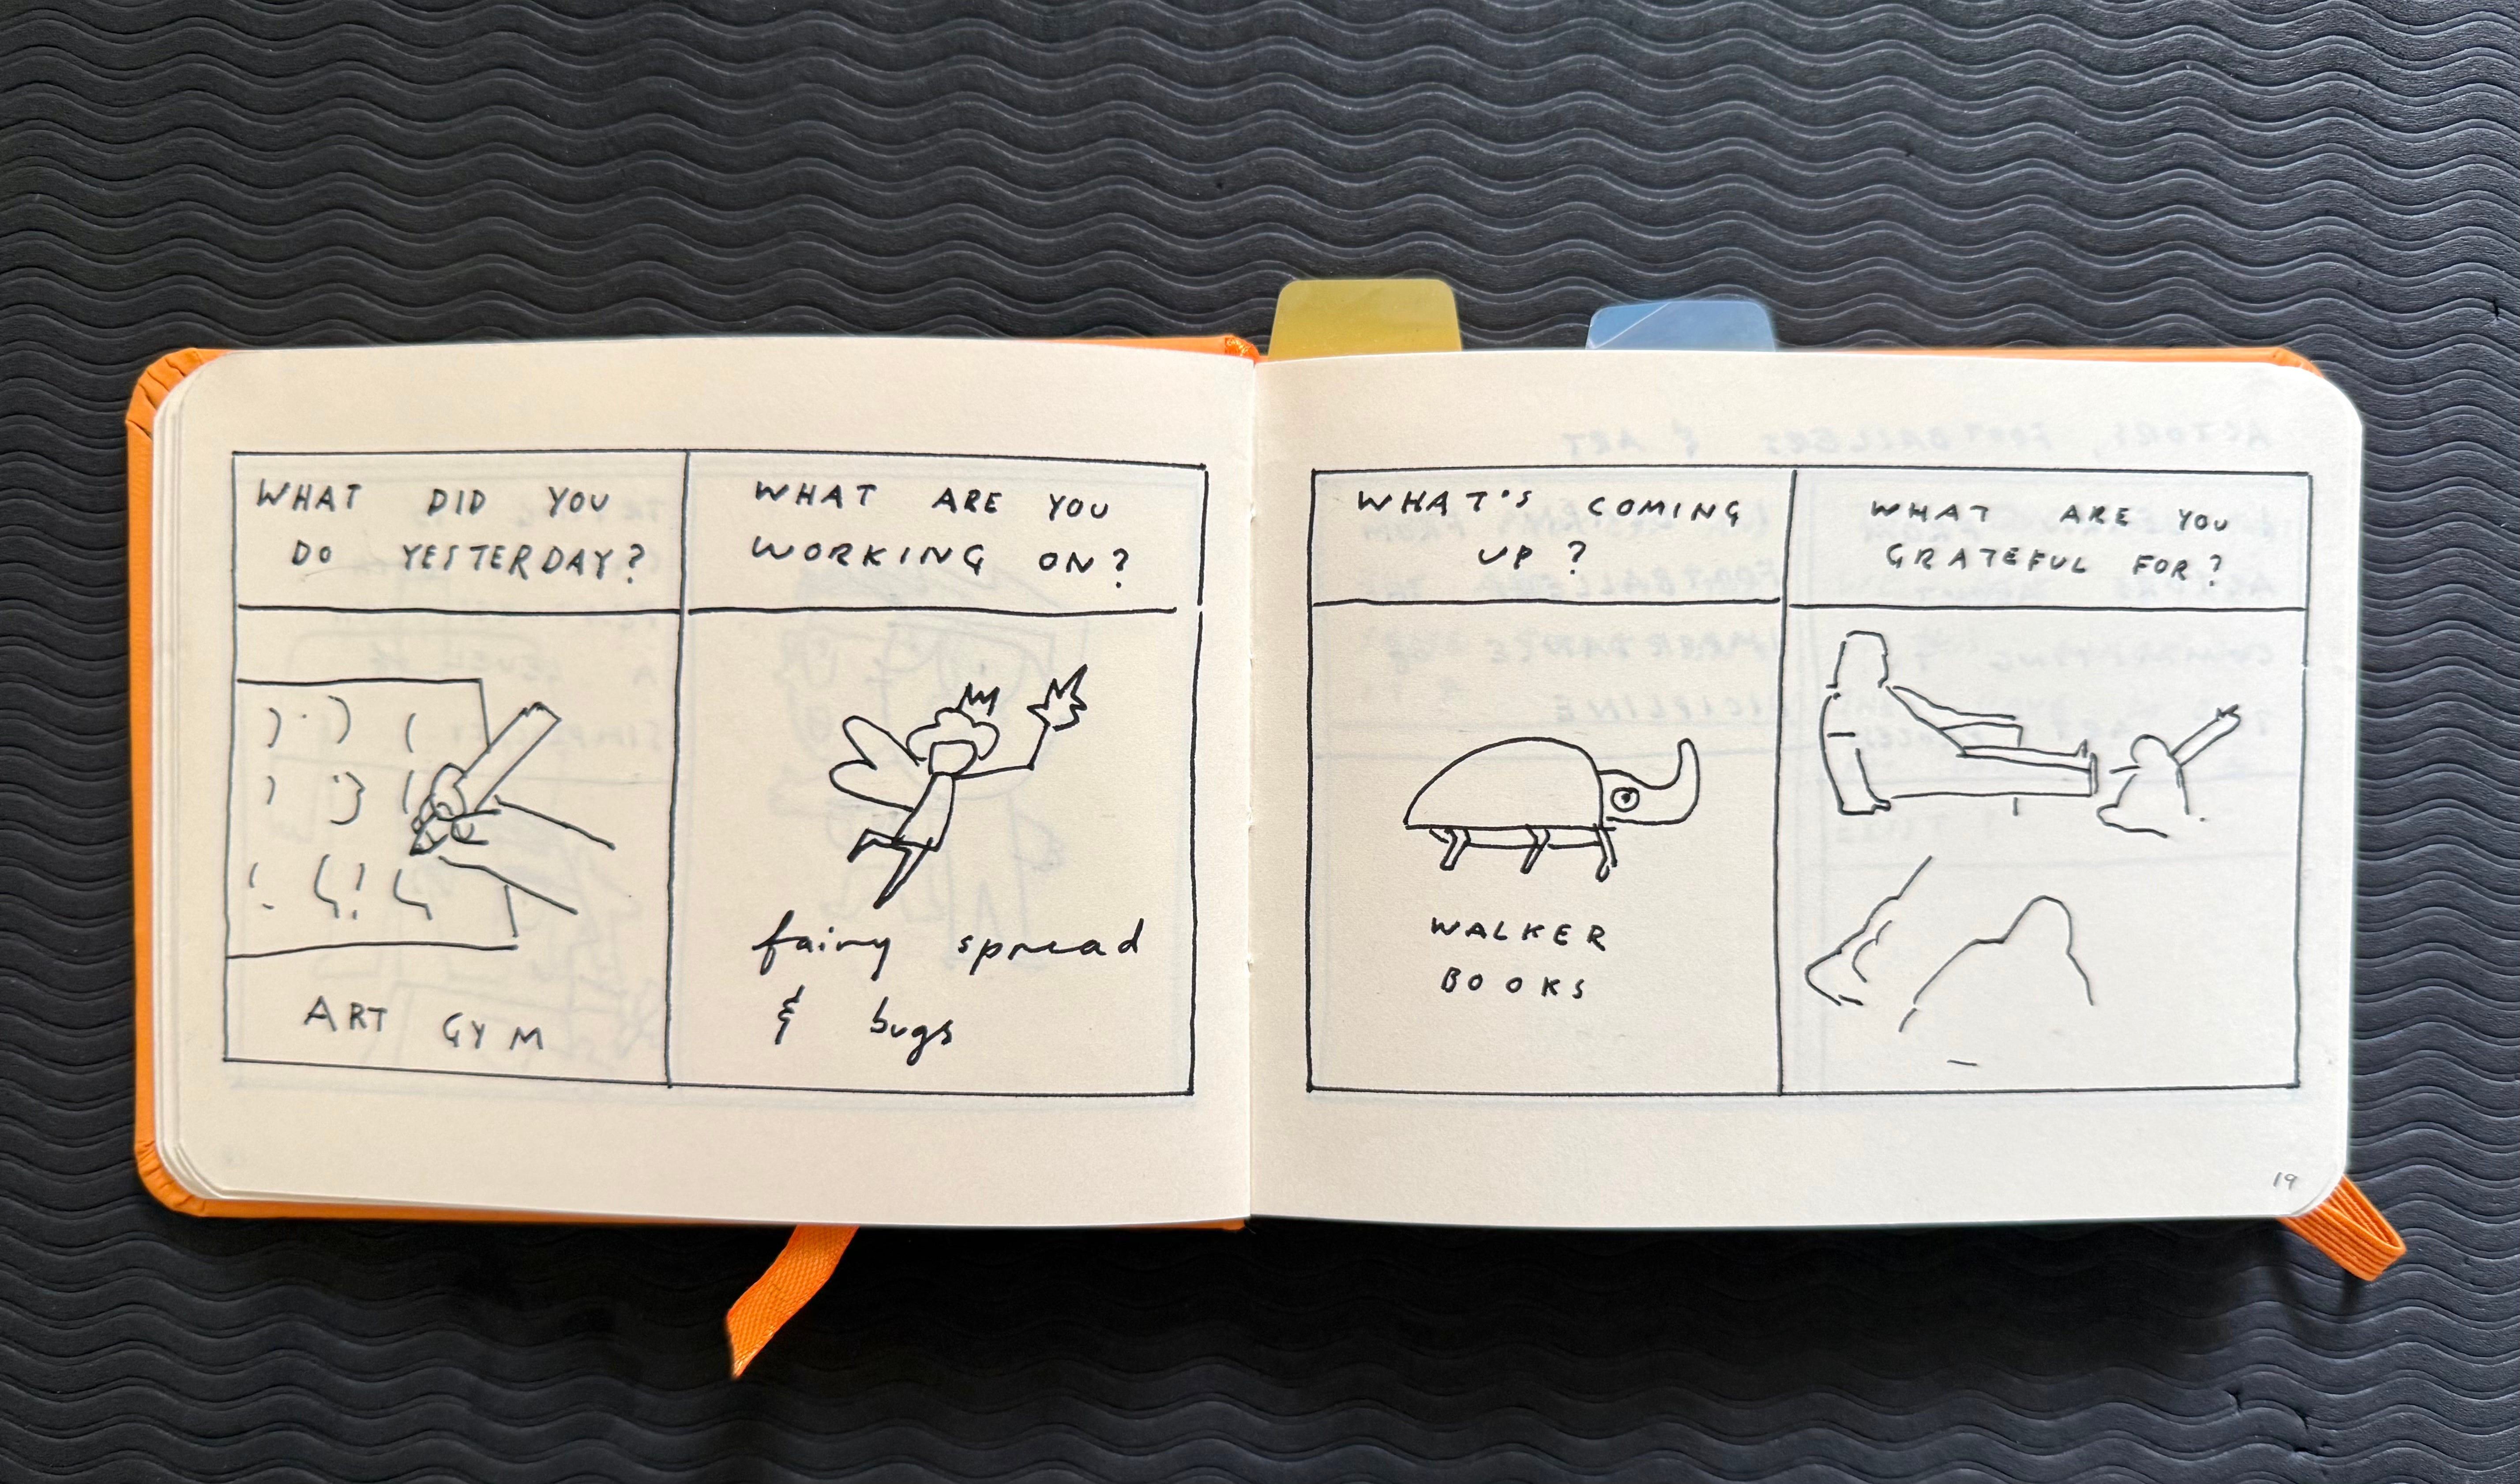
Here’s how you do it.
Divide a spread (or a page) into 4 equal sized panels.
In the first panel answer this question “what did you do yesterday?”
In the second panel answer “what are you working on?”
In the third answer “what’s coming up?”
And in the fourth answer “what’s are you grateful for?”
I normally answer with text, and use the remaining space to draw something. The drawing can be literal or an icon or a pattern or even just a colour.
For more prompts on keeping a diary go here.
DAY 3 Creative Action:
Set up your artist diary
Create an index and number your pages.
In your index assign a page to each of these templates, try one a day
At the end of 3 days keep going with whichever format you like best, or create your own format.
Having a go to format is an easy way to build momentum, simply drawing a frame when you don’t know what to draw will cement your commitment to the day’s session.
📆 Check your inbox again in 24 hours for Day 4. It’s time to say hi to other Ten Minute Artist, and have some of your questions answered by me and the community.

PS: Paid subscribers receive a Creative Spark every day in 2026, each spark contains an idea and a prompt that you can use with your artist diary. That’s 365 days of creative sparks! Part reminder, part slow drip of ideas, and a prompt every single day.
Here’s the entire 5-Day Course in case you missed a day or want to binge:
The Artist Diary
Day 1: What is an artist diary, and why you should keep one
Day2: What stops people from beginning or sticking to this practice
Day3: My three best Artist Diary Setups (repeatable prompts)
I really liked the four-panel comic; it’s low-stakes enough to inspire both drawing and writing. It sparked a lot of ideas for me. Thank you.
I LOVE the index idea, Adam! I’m in the middle of a sketchbook right now but didn’t want to wait until I started a new one, so I created an index in the messy middle for the remaining pages!
Also, it sounds like the sketchbooks I’ve always kept have been artist diaries all along… I always put everything all in one book: drawings, notes, calendars, recipes, stickers, ticket stubs, post-its, photos, etc. Sometimes it’s “pretty”, a lot of times it’s not… No rules!